10 Best photos from #theroolife in August
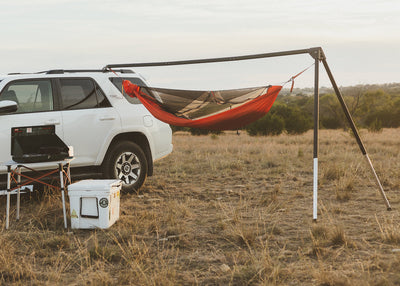
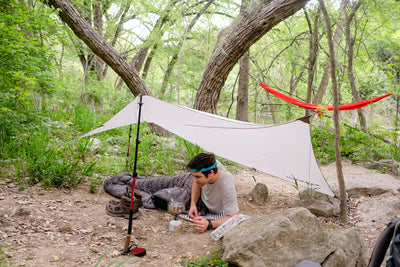
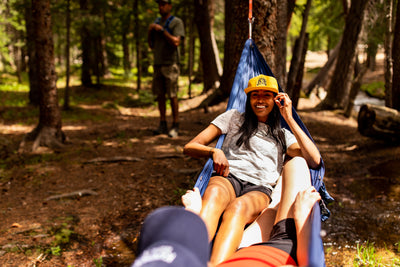
If you are not posting to #theroolife on Instagram, here is what you are missing! The Kammok MOB has been going off lately with some insane photographs. Here are some of our favorites!

If you are not posting to #theroolife on Instagram, here is what you are missing! The Kammok MOB has been going off lately with some insane photographs. Here are some of our favorites!


The universal mount included with every Outpost is designed to be compatible with a wide variety of roof racks. What's Included: 1 detachable ball bracket 2 clamp plates 2 bolts for ball bracket 2 hex nuts for ball bracket 2 t-slot nuts 4 clamp plate bolts 4 hex nuts for clamp plates 2 foam pads for clamp plates Cross Bar Compatibility The image below shows how the universal mount is assembled for cross bar compatibility. This assembly utilizes all of the included parts except for the 2 t-slot nuts. Outpost is designed to mount to all standard cross bars as seen in the following image: Need more rack space? Outpost is designed to work with the universal mount attached on the underside of cross bars as well: T-Slot Compatibility The next image shows how the universal mount is assembled for t-slot compatibility. This assembly utilizes the detachable ball bracket, 2 bolts, and 2 t-slot nuts. Outpost easily mounts to your rack's t-slots as seen in this image: Additional Mounting Options The universal mount can also attach to these style racks using the two clamp plates: Platform-Style Racks Basket-Style Racks Truck Bed Cargo Racks Custom Mounting Additionally, the Outpost universal mount can be custom mounted to a variety of racks using the detachable ball bracket as seen below: Questions? For more information on how Outpost can attach to your vehicle, please reach out to us here.

Last year, with everyone self quarantining across the country and all of our favorite parks closed, we kicked off National Camp at Home Day. We loved seeing the creativity you brought to your at-home campsite, and we couldn’t wait to bring the fun back. This year for National Camp at Home Day, as your favorite camping spots slowly begin to reopen and people are starting to travel safely again, we’re focusing on preparedness. Think of National Camp at Home Day as the perfect occasion to pull out all the gear and have a trial run before setting out on the next big adventure. Over the coming weeks, we’re going to lay it out for you: how to choose the right shelter, tips for gear prepping, perfect recipes for the Dutch oven, and everything in between. So hang the hammock, grab some fresh batteries for the headlamp, and settle in: the adventure starts here. If you’ve never been camping before, even the thought of walking into an REI can feel intimidating. With so much jargon tossed around and gear to research, the knowledge needed to make an overnight trip successful can seem overwhelming. It shouldn’t feel this way. Let’s get back to the basics, starting with styles of camping. Basecamp or Backcountry? You can think of Basecamp as the drive-in spot at your favorite national or state park. You’ll usually have the ability to bring more of the comforts of home, like comfy camp furniture and a broader kitchen setup, and you’ll still have access to the beauty of a place like Big Bend or Great Smoky Mountains National Park. If you’re new to camping, this can be an easy introduction into the world of overnights. We recommend considering what your future goals are, and if backcountry camping is something you want to work towards, think about buying gear that can be used for both applications. No matter how you want to kick things off, there’s nothing wrong with starting small and working out the kinks. Basecamp can have awesome benefits like proximity to water and electricity while still being close to beautiful trails worth exploring. Backcountry, on the other hand, means you’ll be packing everything in on your shoulders, so a lot more attention must be paid to the weight of your kit. There are exceptions as well, like bikepacking and river trips, but for now we’re going to stick with these two basic categories. Backcountry camping can seem like another beast entirely, but with practice, it doesn’t have to be. There won’t be room in your pack for luxury items you might take to Basecamp, but the tradeoff is you can find yourself in remote places with spectacular views. Not to mention, the crowds disperse as you get further away from park headquarters. Backcountry camping allows you to cover ground efficiently and do things you may not be able to otherwise, like making a long, multi-day trek or waking up to an epic sunrise in the Tetons. What shelter is right for you? No matter where you plan to lay your head in the woods, you’re going to have to choose a shelter. Each shelter has its advantages, and you’re going to have to weigh the pros and cons and decide what’s right for you and for the environment you’re camping in. First up: Tent camping. If you’re imagining yourself camping, this is probably what comes to mind. Tents offer considerable protection from the elements, are fairly easy to set up, and work virtually everywhere. Some drawbacks to consider are longer setup and teardown times, added weight in your pack in some cases, and their susceptibility to getting dirty inside or wet from condensation. Also keep in mind that finding the perfect tent site in the backcountry, or even while car camping for that matter, isn’t always so simple. You’ll often end up with a rock in your back or on an annoying slope that sends you sliding to one side of the tent all night. Still, it’s hard to beat the dependability of a faithful tent. Next: Hammock camping. No more long setups before sitting down to enjoy a meal, and you can forget about that rock in your back as well. With the addition of rainflies, bug nets, and plenty of insulation, you’ll feel right at home in virtually any conditions. A huge bonus is the level of comfort you’ll enjoy while sleeping in a hammock—the days of crawling out of your sleeping bag with a stiff back are over! There are downsides to consider, the most obvious being the question of where to hang your hammock. Camping in the desert is likely not an option, and although it’s rare, some parks ban the use of hammocks altogether. It’s always best to check for regulations before making any decisions about how you’ll utilize a park. Bottomline, with the right amount of trees, hammock camping is a solid option. For our grand finale: Cowboy camping. Everyone’s dreamed of sleeping under the stars, and with modern sleeping pads and camp quilts, you’ll sleep more comfortably than John Wayne ever thought possible. A key advantage comes into play after a long day on the trail when all you want to do is crawl inside your sleeping bag. Cowboy camping makes setting up camp as simple as possible so you can focus on the fun parts, like stuffing your face with granola bars and hiking until your heels bleed. Another huge plus as more and more of us move into light-polluted cities is the view of the stars without a rainfly or bugnet overhead. Drifting off to sleep with unmatched views of the Milky Way is an experience that’s truly hard to beat. Before we romanticize this too much, consider that cowboy camping leaves you exposed to the elements—bad weather and critters alike. The last thing you want to face in the middle of a deep sleep is a rain-soaked or scorpion-infested sleeping bag. Still, when implemented in appropriate conditions, cowboy camping can be the perfect way to enjoy the outdoors. If you’re still trying to decide what shelter is right for you, or even if you’re a longtime camper curious about a new setup, National Camp at Home Day is the perfect opportunity for a trial run. In the field, you want to be as familiar as possible with your gear to make setting up camp a breeze. Practice pitching camp at home so when the weather turns south and the wind and rains come, you’re able to get out of the elements and into your warm sleeping bag as quickly as possible. To learn more about hammock camping, check out these two blogs: Four reasons to make Mantis your go-to sleep system Hammock Camping 101

Our outdoor community is built on seeking adventure. Sometimes this means spending time in harsh weather conditions and challenging ourselves physically, while other times it means having difficult conversations and changing our perspective. In this three-part series, we'll be sharing the stories of individuals redefining what it means to be outside. Written by Luisa Vargas. As the chief of the Cameron County Beach Patrol, Art Hurtado is no stranger to being outside. In addition to recent ultrarunning achievements, he spends his time encouraging people to spend time outdoors. Art at Lower Falls in Yellowstone National Park, September 2020 In pre-pandemic times, Art hosted weekly, open-invitation runs in Brownsville, Texas. He also started the only ocean aquathon in Texas in addition to creating one of the first swim clubs in Texas with the goal of making ocean swimming accessible to all. “It might be intimidating, but with the proper education and training, you’d be able to read the ocean too, and it would make it accessible to anyone,” Art says. Having grown up in the Rio Grande Valley, Art tells us it’s common for kids to grow up without the opportunity to spend their free time exploring nature. He started seeking adventures later in life because connecting with the outdoors wasn’t something his parents prioritized. Like many people in this area, Art’s parents grew up in poverty, and he explains that when you’re in that situation, your time is not spent finding ways to travel. “I think a lot of this culture comes from other people, from your parents, someone has to take you [out into nature],” Art says. We all carry both the weight of our parent’s struggles as well as benefiting from their privilege, and for this reason, we continue to see many of the social inequalities that are passed down over time. “My parents worked up from their poverty to lift me up, so I have the option to go to more places,” Art says. The generational progress means that creating equitable outdoor recreation will take time, but Art knows that like his parents, he has a role to play in this. We all do. His parents paved the way for him to have the opportunities that led him to spend his life outdoors, and he is working to do the same for others. Art in Palo Duro Canyon, October 2020 Art has become a mentor in the community by providing people with guidance on places to go and how to get outside safely. Working for the beach patrol provides him with plenty of willing volunteers to facilitate events that encourage people to swim and run. Even though there are many ways to spend time outside that don’t require extensive travel, it’s difficult to adventure because places like Brownsville are far away from parks and other cities with more recreational areas. The closest major city, San Antonio, is at least 5 hours away. Similar to my conversation with Rocio, Art explains that finding safe and welcoming outdoor spaces close to home is crucial to getting more diverse groups of people outside. “Brownsville’s park department has done wonders for the community in the past 7 years. They’ve poured money into developing trail systems—it’s shined through,” Art says. He is hopeful because he sees things are changing. Especially during COVID, local governments are expanding trail and park systems. Since there is access to green spaces closer to home, people are beginning to explore more. Isla Blanca Park located on South Padre Island, August 2019 The layers of inequality in outdoor spaces span generations. However, it’s people like Art who focus on the things they can control who end up shaping their communities and ultimately, the system. If we each focus on encouraging and helping one person to spend more meaningful time outdoors, think of all the lives that would be transformed. Art’s story is a reminder that education and systemic change are the driving force of creating equitable outdoor spaces, but it’s individuals who ignite the movement. Today, I challenge you to elevate time outside for someone in your community. Share your favorite local park with a friend, lend a family member your Kammok gear, show a stranger on the trail your favorite overlook. Here are some other ideas on ways to give adventure: Organizations and companies supporting diversity in the outdoors: Melanin Basecamp Disabled Hikers Venture Out Project

Once you’ve picked out which Kammok hammock style works best for you and your favorite color (we think that’s the hardest part), it’s time to learn how to hang and care for it. We’ve compiled a guide for all your hammock care needs that can be applied to any Kammok hammock type (Roo Single, Roo Double, Roo Jr., Roo Double XL, and Roo Single UL) How to Set Up Your Hammock Applies to all Kammok hammock types excluding the Roo Single UL. Find two points to hang your hammock between. Each hammock size calls for a slightly wider or narrower set up, however the standard to look out for is 12-15 feet. Grab your hammock straps. Wrap the widest part of the strap around the tree or post. Pull the strap through the end with the single loop. Ensure to loop your straps around the tree about 6 ft high. Unbuckle the rolled up top from your Roo hammock and pull out the fabric. Clip the hammock carabiner through one of the Python strap loops and repeat this step on the other side. Tip: Clip the strap bag onto hammock carabiner for safe keeping. For a safety check, press into the center of the hammock to test before sitting down. Adjust your hammock as needed to rest at a 30 degree angle and try out the other ways of hanging below. How to Hang In Your Hammock Applies to all camping hammock types. Who said hammocks are only for laying down? There’re so many ways to hang in your favorite Kammok hammock depending on where you are and who you’re with. Here are a few of our favorite ways to hang. The Chair - Perfect for talking in a group, watching the sunset or hanging around a campfire. An easy way to sit upright and relax with legs hanging over the hammock or cross legged. The Lounge - Our favorite way to nap, relax and look up at the sky on a starry night. Lay diagonally, spreading the hammock fabric for space and comfort. This one is great for cuddling with your adventure dog (or human). The Perch- A good way to hang while reading a book or hanging with a buddy in a Roo Double or Double XL. Scoot to one end of your hammock and sit upright while keeping your legs straight. How to Pack Your Hammock Applies to all camping hammock types. When you’re done using your hammock for the day, it’s important to pack it after each use to protect the fabric from long-term exposure to the elements. To do this, unclip one side of the hammock and pack it into the stuff sack, one side at a time. Then, unclip the second side of the hammock. We recommend keeping the carabiners on the top. Roll the stuff sack twice and and buckle the sides. Roll up each Python strap and place them back into the stuff sack. How to Wash Your Hammock Applies to all Kammok hammock types excluding the Roo Single UL. Hand wash Roo Single UL only. If your hammock is soiled or stained from all your epic adventures, we recommend hand washing when possible. However, avoid washing your hammock frequently since this will deteriorate the DWR coating and lessen durability of the fabric over time. If using a washing machine is necessary, make sure to use one without a center agitator as this can tear up the fabric. Remove the carabiners and slings prior to washing. Place the hammock fabric in the washing machine. Fill the Grangers Down Wash + Repel cap to the recommended level. A gentle powder detergent will work as well. Do not use fabric softener, bleach, or stain removal products. Wash the hammock fabric by itself on a gentle, cold-water setting. Hang dry in a warm and non-humid environment until the fabric is no longer damp. Once the fabric is completely dried out, attach the slings and carabiners to the ends. You can use an unopened pen to help thread the sling back through the hammock fabric. Your hammock is clean and ready for more time outside. These tips and guidelines will help you make the most of your Kammok hammock. Make sure to check out our Help Center FAQ for all of your product use and care questions.