Camping “DIY Tent Glamping” Gear Guide: Dr. Felicia Wong
Dr. Felicia Wong is a physician, outdoor enthusiast, and wellness blogger based in Southern California. Between her and her husband (also a physician)'s busy work schedules, raising two young sons, and running her popular Instagram account Everyday Adventure Fam and blog on adventure tips, she exemplifies what it means to live intentionally and joyfully with her family. The Wong family can be found hiking, biking, enjoying a day at the beach or skiing in the nearby mountains on any given weekend. However, one of their favorite activities is camping. In this blog post, Felicia shares her tips and recommended gear to help others who are interested in camping get started.
This guide is for individuals, couples, or families who are interested in trying car camping. The following recommendations are not for backcountry camping, and are comfort-oriented for a “DIY glamping” type of experience. I fully recognize that many of the following items are not necessary, but my experience has been that comfortable campers are happy campers, and I’m proud to take credit for converting several friends who had never camped before, or who were skeptical about it, into willing, maybe even enthusiastic, campers.
I’m sharing this list of tried and true items that we have purchased and used on our own camping trips, and that we like enough to have recommended to our friends and family. I have provided links to products throughout this list. Most of our items were purchased from REI or Amazon, though some are from small shops such as Power Practical (luminoodle), Miir (insulated camp cups), Rumpl (sleeping bag like throws and blankets), Kammok (hammock and stand).
DIY Tent Glamping Basics
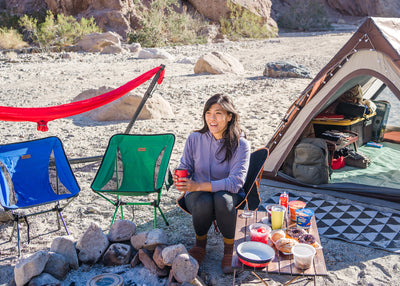
Tent: We have the REI Kingdom 6. The general rule of thumb for comfortable family camping is to choose a tent at least +2 greater than the number of people you intend to sleep on the tent. We’re a family of 4, so bought the 6 person version. Some of our friends who like to spread out more or have older kids bought the 8 person version, and have plenty of room in their tent to fit 2 queen air mattresses, and have space in the front for storage and indoor card / board games (handy, in case of less desirable weather) . We also bought the tent footprint to keep the bottom clean and dry. A waterproof tarp will work for this purpose as well.
Sleep System: We use air mattresses, and sleep comfortably while camping. We have the REI Queen Sleep system, and it is such a comfortable air mattress, we’ve even used it at home when guests come over! As the boys have gotten bigger, we’ve added a second one (twin) to our tent setup. Eventually, we’ll probably need two queen size mattresses.
Cozy Blankets and Throws: The comforter that came with the REI sleep system is warm enough for summer camping in Southern California. For additional warmth and lounging by campfire, we like our Pendleton wool camp blankets and Rumpls (we have original puffy, but also have a couple down blankets which pack down so small!) For a budget option, Costco sometimes carries down throws.
Sleeping Bag: After a very chilly camping experience (37F), we found an additional sleeping bag necessary for camping down to 20 degrees F. I found this double wide Omnicore sleeping bag rated for 10, and it has kept us warm for these situations. We still also use my 20 year old north face sleeping bag -which shows that gear does last forever if you take care of it!
Pillows: We’ve tried a few, and these Thermarest compressible pillows are the most comfortable.
Lighting: We’ve found some great deals on camping lanterns from Costco. We bring flashlights for the kids. Instead of single use glow sticks, I’ve found some LED glow necklaces that make it easier to spot kids (and adults) after the sun sets. I like the Black Diamond Moji lanterns which are small but mighty, and can be hung on a carabiner to the top of your tent to provide a good amount of light at night. Recently, I’ve tried the Aimtom Power mini camping lantern and am very impressed with how much light it puts out!
Camp Cooking
Camp Stove: We like this Coleman triton stove and its carrying case.
Cooking Table/Storage: GCI Outdoor slim-fold Camp Kitchen Portable folding cook station
Camp Kettle
Coffee Supplies: We use a Stainless Steel french press, or a collapsible drip coffee maker. Our friends have had success with a percolator. Recently, we’ve also enjoyed Kuju Coffee since serve drip coffee.
Cast Iron Pan with Lodge cast iron pan silicon handle
Oven Mitts: Don't forget to protect your hands when handling hot kettles or roasting sticks.
Enamelware Dining Set: We have this Every day set from Stansport, and for Glamping, we have this beautiful dipped set from Barnyard Electric. It is $$$ and was a birthday gift, but we use them year-round and quite frequently for our backyard dinners and with the kids (enamel ware = childproof and unbreakable!) I’ve seen s started carrying a very affordable and classy looking enamelware mug and plate.
Camp Cooking Utensil Set: This set has everything you really need.
Camp Collapsible Dish Bin
Scrub Brush: for doing dishes
Camp Soap: campsuds
Egg Storage: It really works and keeps our eggs from crushing!
Cooler: We tried a bunch of coolers before getting Yeti Hopper flip and it really is amazing – keeps food cold all day in the summer heat with proper ice packs in place and doesn’t sweat. We were skeptical, but it really has outperformed all our other coolers, and it’s a perfect size for road trips and picnics. We also have the tundra haul which has kept food cold for 4 days, and is better for longer camping / road trips.
Pop up trash can
NOTE: On some camping trips (i.e. when water is limited), we have found it easier to use biodegradable disposable plates, rather bring all our enamel ware and do dishes. These not only look great, but they are really effective kindling as well!
Bathing
Bath caddy or hanging organizer
Biodegradable soap: from REI
Microfiber towels: These are great and less bulky. I think they might be seasonal but you can find them at Ikea for a great low price.
Nalgene travel leakproof bottles: for toiletries
Seating/ Hanging Out
Don’t forget your camp chairs: we have an assortment of REI camp chair, Coleman kids chairs, Coleman adult chairs. We love these small packable ones from trekology and have been bringing them on road trips and even for tailgating parking lot picnics during the pandemic.
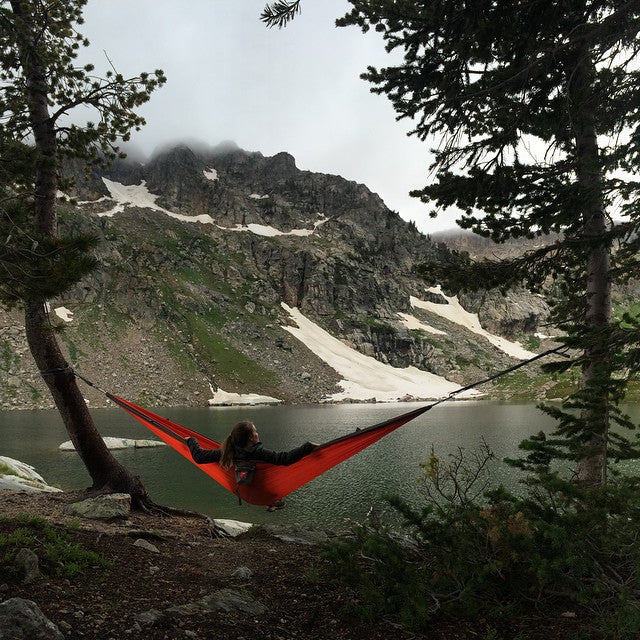
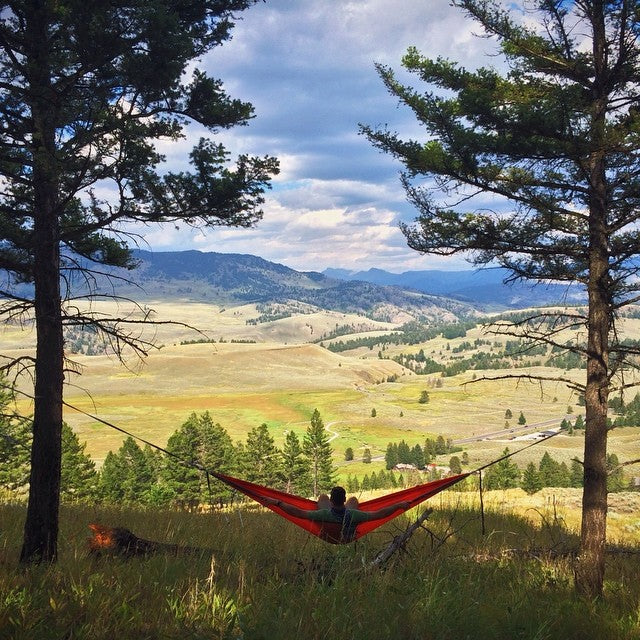
Hammocks are great for seating or lounging! We haven’t tried sleeping in one yet, but we’ve heard some people do hammock camping! If you’re in Southern California like us, we don’t have many trees so we have found this Swiftlet portable stand super useful with our double room hammock.
Extras, that enhance the experience
Camp Organization: We have this Ozark trail folding end table with cup holder.
Camp Table: It’s really nice to have a table to set things on when sitting by the campfire. For example, you’re s’mores or hot chocolate. We get a lot of use out of our large Trekology table
Luminoodle: I love these colored rope lights – they add a splash of color to your tent. Makes it easy to pick out your tent when it is dark out and you are walking back from the bathroom.
Tablecloth: Adds ambience and provides a trusty clean surface.
Tablecloth Weights: Coleman watermelon table weights.
Glowsticks: for the kids, for a more sustainable option – we’ve moved to these reusable LED necklaces and have a different color per family member.
Telescoping Smore’s Sticks: We like these ones.
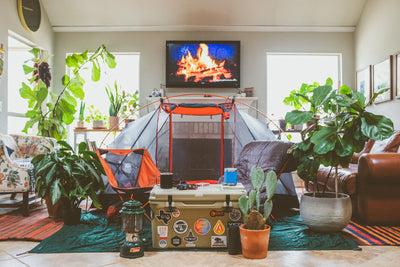
Mystic Fire: Turns campfire into a rainbow. Everyone loves this!
Gas Campfire: We have the Camco big red campfire, and it comes in handy in Southern California where there are often wood fire bans.
Kids Play Tent: I found one on sale for a little over $10. This is nice to have because it provides shade for kids in summer, and a place to play. Meanwhile, they don’t track a ton of dirt into your actual tent.
Doormat: I got a cheap one from Target. Keeps the dirt from tracking into the tent if you’re camping by the beach or some other dirt campsite. We did not find this necessary when camping on grass.
Bring From Home: Scooters or bikes for kids.
I hope you find this list helpful. Again, this is just a guide and what has worked for us. None of this is “necessary” for having fun. As I prefaced, for some – a simple tarp will suffice. We did not buy all of this gear at once, but have accumulated items over the years. We generally wait until things are on sale – Labor day, Black Friday and Memorial Day tend to be sale times for outdoor gear. Finally, for those who are wondering, we organize our camp gear into several large bins, which we then store in our garage – always ready for our next trip.
Happy Camping!
If roughing it in the backcountry doesn't get you excited, give glamping a try on National Camp At Home Day. For more family camping, traveling tips and inspiration, follow Dr. Felicia Wong's Instagram account Everyday Adventure Fam and blog.