Best of #theroolife Sept 22-28th
Posted by: Ty Clark
•
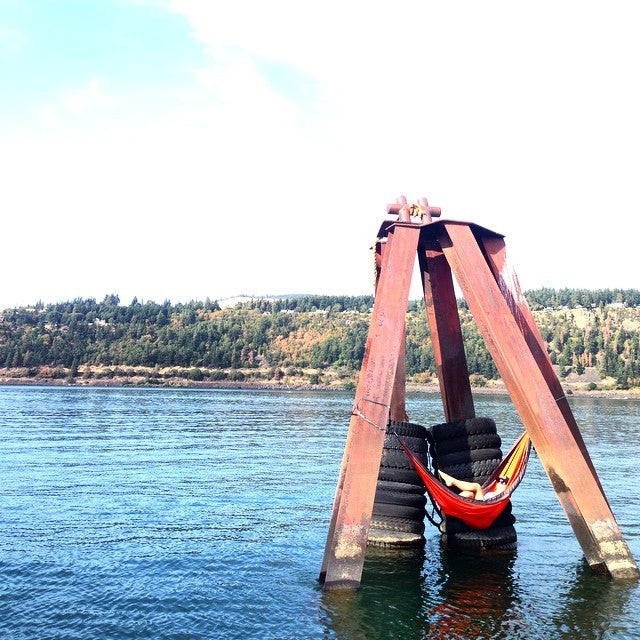
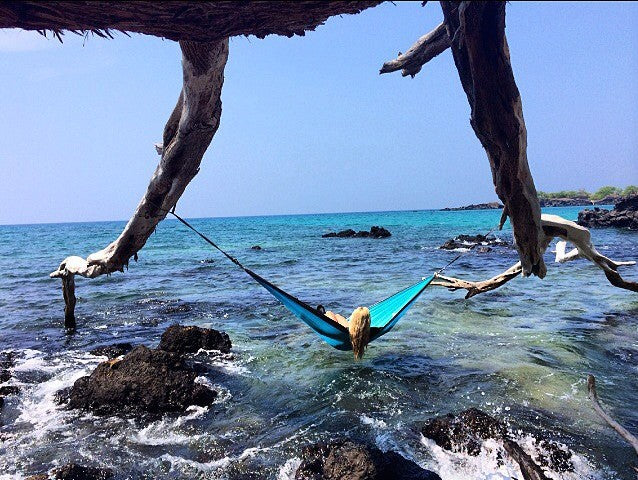
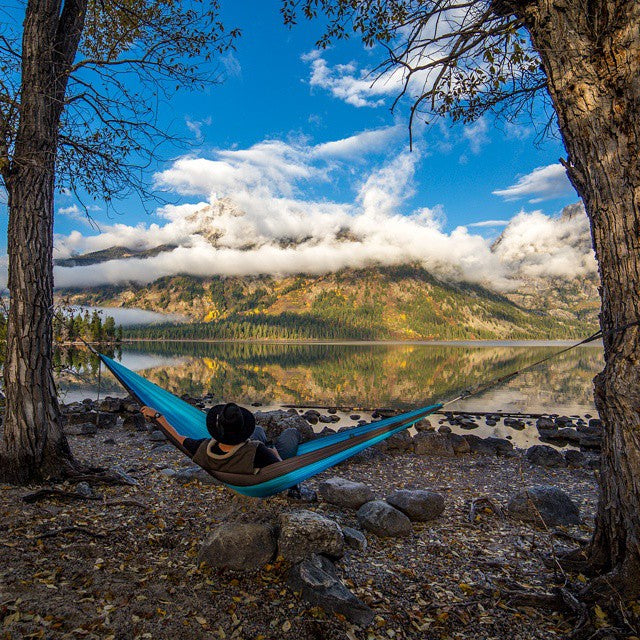
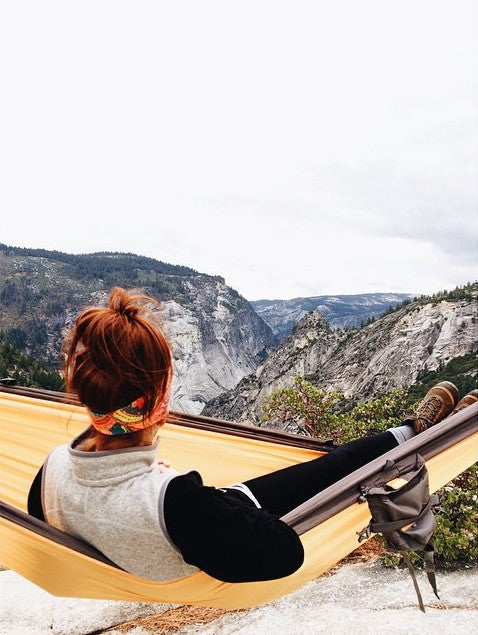
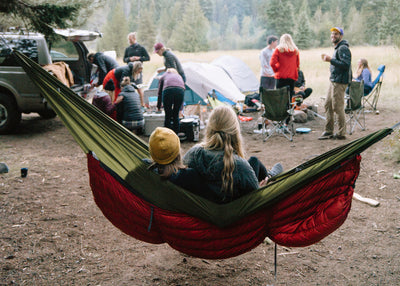
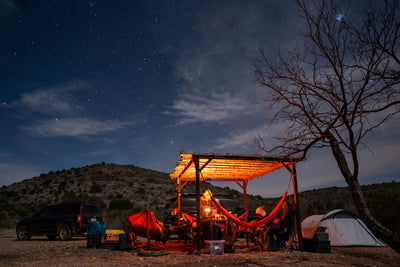
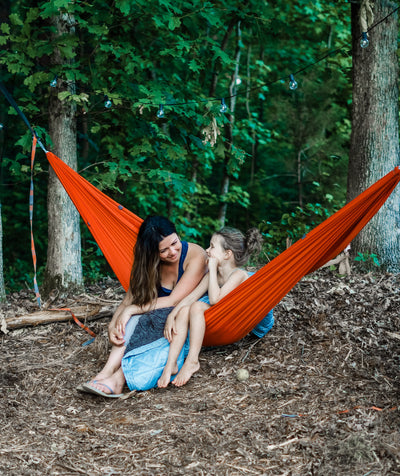
Here a few amazing images from our hashtag #theroolife.
Make sure you are tagging your Instagram images so that we can repost them from our page!


Here a few amazing images from our hashtag #theroolife.
Make sure you are tagging your Instagram images so that we can repost them from our page!
National Camp at Home Day was started two years ago as a way to experience camp when travel restrictions were in place, but it lives on today as a reminder to pause wherever you are and take a step outside. Sounds pretty simple, right? That’s because it is! On March 27th, we celebrate outdoor restoration at home. Whether you’re too busy to plan your next camping trip, you’ve got little ones at home that aren’t quite ready for the backcountry, or you’re just looking for a reason to set up your tent and roast some marshmallows, this day is for you. Take a break from the weekly hustle and bustle and experience the magic of basecamp. 1. Prep your gear for spring adventures. The backyard and the living room are great places to double and triple check that all your gear is still in tip top shape and that no crucial pieces are missing. Maybe your bugnet has a hole that you didn’t notice before (shoot!), or you accidentally left an apple core in your sleeping bag and it’s been developing a special kind of funk (tarnation!). We get it. Sometimes when you get home from a long weekend, you just wanna shove your gear in the closet and move on. Hopefully you won’t find any surprises in your gear box, but if so, the 27th offers an opportunity to sort things out ahead of time. 2. Explore a new local park. We all have that one local spot that we’ve yet to explore. It’s been on our list for over a year, and we’ve still yet to go. Hopefully National Camp at Home Day is just the motivation you need to stop making excuses and go check it out. Go find a new hammock spot, hike on a new trail, or play a round of disc golf. Take a cold beer along, and you really can’t lose. 3. Have an adventure themed movie night. The best way to get amped about your next big adventure? Settle in and have a low-key adventure movie night! Sure, we’d all rather be out exploring our favorite national park for days on end, but when all you have is a Sunday night, it can be pretty restorative to live vicariously through someone else for an hour and a half. We’ve put together a list of our favorite films to stream right now, and we hope you’ll find them just as inspiring as we did. 4. Enjoy a cocktail on your balcony. Again, the goal here is to just get outside. Plain and simple. We really can’t think of anything better, especially as beautiful spring weather rolls into the Lone Star State, than taking an hour or two to decompress outside with a book and a cocktail. The bar is low, people. Like low low. But we believe the restoration these moments can provide is huge. Take a deep breath, shut the laptop, set down your phone, and crank some tunes on your outdoor patio. This is the fresh air, and the delicious cold beverage, you deserve. Plus, we've got the perfect cocktail recipe for ya! 5. Invite friends over for a cookout. Honestly if we could just get rid of kitchens, we would. Okay, maybe that’s not entirely true, but man…cooking over an open fire? There’s really nothing better. Not only do you have the benefit of outdoor cooking, but once the fire is piping hot, you’ve also just created the perfect place to gather for you and your friends. Cook some steaks, bust out the marshmallows, maybe even pass a bottle of whiskey around the fire if you’re feeling extra frisky. National Camp at Home Day only comes once a year, so you might as well enjoy it the right way! 6. Plan your next far flung adventure. We’re calling on the crazy adventure planners of the group with this one. There’s no better place than fireside with a bottle of your favorite spirit to get your best buds to commit to the next big camping trip. We even have a cool segue that’s sure to win the crowd over: “Wow, camping at home is so fun! You know what would also be fun? Going camping in Montana!” Talk about a seamless transition. Now you’re ready to pitch your next big backpacking or river trip. Want to get more out of National Camp at Home Day? Discover amazing deals, a gear giveaway like no other, and much more here.

By Luisa Vargas The weather in Austin has been less than ideal (by Texan standards). We’ve seen more rain these past few weeks than we do all year, and Thursday was the hundredth consecutive day of thunderstorms. Or at least if felt that way! The result of constant rainfall at the Barton Creek Greenbelt trail in Austin, TX. Wednesday night, our team decided to hold off on doing Taco Tri as the thunderstorms were getting pretty bad. It turns out all it did was rain that day. But the fun part about a virtual Taco Tri is that even though we didn’t get to participate in Austin, people all over the world did. Photo of Seth Tullar (right) in Australia. This month was particularly exciting because our friends in Australia participated! This is one the furthest away someone has been whose taken part in Taco Tri. Thank you, Seth, for tri-ing with us! We hope the weather was better “down under." Abelardo was runner up in the competition taking part in the tri in Alaska! We hope next month we’ll be able to Taco Tri again in Austin and can’t wait to see what other exciting places people will participate on July 1st!
Alisha McDarris is the co-founder and writer at terradrift.com, a sustainable travel and outdoor adventure blog and YouTube channel where gear reviews, how-tos, and guides help folks get outside to play more and do so safely, responsibly, and sustainably. There’s little more thrilling than outfitting yourself with a few new pieces of gear. The excitement! The thrill! The compelling urge to get outside to use it as soon as humanly possible! But constantly buying brand-new gear is hard on the environment. Virgin materials, resource-intensive manufacturing processes, and harsh chemical dyes all contribute to harmful greenhouse gasses, and often, the well-loved gear we just replaced gets tossed in a landfill where it could take hundreds of years—if not longer—to break down. But there is a solution: used gear. Buying used instead of new is good for the planet, good for our wallet, and good for overflowing landfills. And it’s still just as exciting. It’s new to you, after all. So if you want to make your camping setup more sustainable, consider buying used instead of new. Here’s how (and where). Where to find used gear If you’re not sure where to start when it comes to used gear, don’t sweat it; there are plenty of places to find it online or in person. Start by checking at a local gear shop if you’re lucky enough to have one near you. Many local shops have used or consignment sections. Some cities even have stores dedicated entirely to used gear. If there’s not a used gear shop where you live, keep an eye out for sample sales. Kammok isn’t the only brand that hosts them as a way to offer solid used gear at a discounted rate! Next, check larger retailers like REI. The stores host several Garage Sale events per year that offer returned and used gear at deeply discounted rates. During COVID, most stores still place Garage Sale items around retail locations so savvy customers can still find a good deal. You do have to be an REI Co-op member to shop Garage Sale items, though, so keep that in mind. Online is a great place to look for used gear too. REI has a used gear section, as do many outdoor brands like Patagonia, Arc’teryx, and The North Face. Another favorite is GearTrade.com, which is all used outdoor gear all the time. You may even find items with the tags still on! Lastly, it never hurts to check sites like Ebay, Amazon Warehouse, Craigslist, or Facebook Marketplace. You can often find used outdoor gear in your own neighborhood. How to score the best used gear Of course, not all used gear is quality used gear. There’ll be plenty of used and abused, weathered and battered gear out there, but there’s also plenty of gear that’s barely been touched. On online listings, look for wear ratings like good, fair, or excellent. Then check for details on what’s wrong with it if it’s not in great condition. Sometimes a pair of boots may have been worn thin. Other times, all that’s wrong with a tent is that it has a small puncture hole in the floor (more on repairing used gear below). Make sure the item you’re considering suits your purposes, then buy with confidence. If you’re shopping locally, either from a retailer or individual, don’t be afraid to ask to unpack a sleeping bag, set up a tent, try on a jacket, or inflate a sleeping pad. Make sure it’s in as good of shape as the seller claims before you buy. Check for warranties Many quality outdoor gear brands and manufacturers offer excellent warranties with their gear. Osprey, for example, offers their All Mighty Guarantee on everything they make (whether or not you bought it used), and Kammok gear comes with a lifetime warranty too, which even backs their used gear! So check which manufacturers offer lifetime warranties and find out if that warranty extends to a second owner or used gear sold directly from the manufacturer. Then, if it needs repairs, find out what it takes to ship it in and get it fixed up like new. Repair worn or used gear Finally, if you found an amazing piece of gear for a stellar price, but it has a small tear, defect, broken buckle, or the like, don’t shut it down just yet. Most gear can be repaired, and often, all that’s required is a wash, re-waterproofing, patch job or zipper lubrication. Learn how to perform basic maintenance on your gear and you’ll not only be able to keep it in use longer, you’ll be able to score great deals on slightly defective gear as most people won’t bother repairing it. For example, I scored at least half off an expensive Big Agnes tent that was probably used once at an REI Garage Sale because it had a small tear in the floor. I took it home, patched it in two minutes, and the tent is just like new. Sell your old gear Now that you’ve replaced a few items in your gear closet with quality used camping gear, don’t forget about your old gear! If it’s still in decent or better working order, clean it up and resell it! Use sites like Craignslist or Marketplace or gear-specific sites like GearTrade.com. REI also lets members sell their used gear on REI.com now! If it’s time to retire an item permanently (say, if a tent is falling apart at the seams, or a sleeping bag is so old it’s lost all of its loft), take a minute before tossing in the garbage can. Many materials, buckles, and accessories can be removed and reused on other repair or DIY projects. And some repair shops and universities may even take the old gear for certain specialized programs. It’s always worth it to check as most plastic and synthetic materials won’t break down in landfills. Bottom line Used gear is more sustainable than the shiniest new eco-friendly gear. So if it’s sustainable camping you want, it’s out with the new and in with the old! Fill that gear closet with quality used items and feel good about reducing your footprint, being kind to the planet, and saving yourself a few bucks in the process.
We've grown acquainted with the backyard (maybe a little too much) over the past few months. Every corner of the yard investigated, every blade of grass counted, and no stone left unturned. You’ve become the park ranger of your terrain. So, why not take this opportunity to learn a new skill – learn to hammock camp in the backyard. Across any outdoor activity, it’s best practice to give your gear a test run before heading into the great outdoors. Imagine if you arrive at your campsite when it’s dark, raining, or right after a tiring drive, you’ll be frustrated as you attempt to rig your system for the first time. There is no better space like the backyard to master new skills and bring confidence for days ahead in the backcountry. Whether you’re an avid tent camper wanting to give hammocks a go, or dipping your toes into camping for the first time, give yourself a test run in a familiar and safe environment. Plus, if it turns out hammock camping isn’t for you (we highly doubt it as the hammock people we are), your bedroom is just a few steps away. Let’s get started. Backyard role call Before we talk about the not-so nitty-gritty details of hammocks, let’s talk about the anchor points where you will hang a hammock. Take inventory of your backyard for tall sturdy structures that can safely support your weight. You’re looking for a pair of live trees or sturdy posts about 12-15 feet apart. Since you're in your backyard, don't hesitate to take out the measuring tape to get a feel for the distance. If you don't have a pair of trees, you can also hang between two car racks or between a car rack and a tree. Shopping for the essentials A hammock and a pair of straps are the bare essentials to get camp off the ground. It’s as simple as that. You can take it to the next level with bug protection, weather shelters, and hammock insulations, but we’ll focus on just the essentials for this blog. Essential #1 Hammock When shopping for a hammock, you’ll want to look at the material and weight capacity for strength and durability. Aim for ripstop nylon fabrics. If your hammock gets a small hole, ripstop will prevent additional tearing so your hammock doesn’t shred like string cheese. You’ll also want to take into consideration the size of the hammock for comfort. The right hammock size is a matter of individual preference. Hammocks come in multiple sizes and most people will have no problem finding a comfortable fit. Best used for Lounge Capacity Dimensions Max Weight Capacity Packed Weight Roo Single UL Backpacking 1 person 4 ft 2 in x 8 ft 4 in 300 lbs 5.6 oz Roo Single Camping & lounging 1 person 4 ft 2 in x 8 ft 4 in 400 lbs 10.2 oz Best used for Lounge Capacity Dimensions Max Weight Capacity Packed Weight Roo Double Camping & lounging 1 - 2 people 5 ft 7 in x 10 ft 500 lbs 18 oz Roo Double XL Camping & lounging 2 - 3 people 6 ft 6 in x 11 ft 6 in 500 lbs 22 oz One last thing to consider when shopping for a hammock is the modularity capabilities for adding creature comfort accessories like under quilts, sleeping pads, etc. All the hammocks listed above have integrated loops lining the fabric edge, making it possible to attach accessories. You may not need these loops for your first test run in the backyard, but you’ll be glad to have them in the backcountry. Essential #2 Hammock straps When researching hammock straps, you’ll see the term “hammock suspension system” come up a lot. This simply refers to how a hammock hangs between anchor points, aka the straps and carabiners (sometimes toggles) that connect the hammock to the straps. It’s good to note not every hammock brand provides carabiners, which is why you’ll see carabiners included in some strap packages. If you’re picking up any Kammok hammock you won’t have to worry about this. Strap style: You’ll see all sorts of shapes and sizes from rope to flat webbing. Ropes require knot tying skills and due to the thin characteristics of their design, they tend to cut into tree trunks. We recommend flat webbing straps to evenly distribute weight on the tree and they do not require knots. Webbing straps are easy to use and great for first-time hammockers. Strap length: Hammock straps are typically sold in a pair, two individual straps in a single package. You’ll want to look at the length of each strap and the combined length. We recommend 10ft straps (a combined length of 20ft) for the most common setup. If your anchor points are very far apart or very wide in diameter, you could increase the strap length with extenders or opt for longer straps. Strap attachment points: Hammock straps have several loops along the strap to clip in a carabiner. The more points of attachment, the better control you’ll have in setting the optimal hang angle. Weight capacity: The weight capacity of your straps is just as important as your hammock. Your straps should at least match or go above the weight capacity limit as your hammock. Best used for Strap Style Combined Length Length per strap Attachment points per strap Weight Capacity Packed Weight Python 10 UL Backpacking Flat webbing 20 ft 10 ft 20 points 300 lbs 3.2 oz Python 10 Camping & lounging Flat webbing 20 ft 5 in 10 ft 2.5 in 20 points 500 lbs 8.2 oz Best used for Strap Style Combined Length Length per strap Attachment points per strap Weight Capacity Packed Weight Python 15 Camping & lounging Flat webbing 30 ft 3 in 15 ft 1.5 in 33 points 500 lbs 11.8 oz Python Extenders Camping & lounging Flat webbing 9 ft 2 in 4 ft 7 in x 2 in 1 point 500 lbs 6.4 oz Setting up your hammock Once you’ve acquired the essentials, you’re ready to hammock camp in the backyard. As we walk through the steps below we’ll use a Roo Double and Python 10 straps as the example. Step #1 - Find the perfect spot: Great job! You already scouted the backyard for the perfect anchor points to hang your hammock. The ideal anchors are 12-15 feet apart and sturdy to hold your weight. For a Roo Single, a shorter hammock, the ideal distance is 10-13ft. For a Roo Double XL, a longer hammock, the ideal distance is 13-15ft. For this example, we’ll refer to the anchor points as trees. Step #2 - Putting up the straps: The ideal height to hang each strap is at eye level or higher. The widest end of the straps should rest around the tree. To hang, feed the narrow end of the strap through the opening of the wide end. Step #3 - Attaching the hammock: With the carabiner attached to your hammock, clip the carabiner into one of the attachment points on your strap. Repeat on the other side. The goal is to have the lowest point of your hammock hang no more than 18 inches off the ground, roughly shin height. This may take a couple of tries since it’s your first time, but once you’ve got it down, next time will be a breeze. Step #4 - Get in: We recommend weight testing with your arms before jumping in. Push down firmly on the hammock and make any adjustments if needed. Once everything looks and feels good, you’re clear to get in. A final word of advice for backyard campers Going hammock camping in the backyard is as simple as owning a hammock and pair of straps. You can take it to the next level with bug protection, weather shelters, and hammock insulations, but if you don’t have that gear, that shouldn’t stop you from trying something new. Add warmth by using a sleeping bag you already have or pull the sheets off the bed. Check the forecast to camp on a clear night to eliminate the need for a weather shelter. Plus, you'll be able to stargaze without a shelter over your head. By using what you have and checking the weather beforehand, you don’t have to go all-in acquiring the additional gear until you’re ready. Start small in the backyard and work your way up to camp in the backcountry.
